Why Your Homemade Butter is Grainy or Lumpy

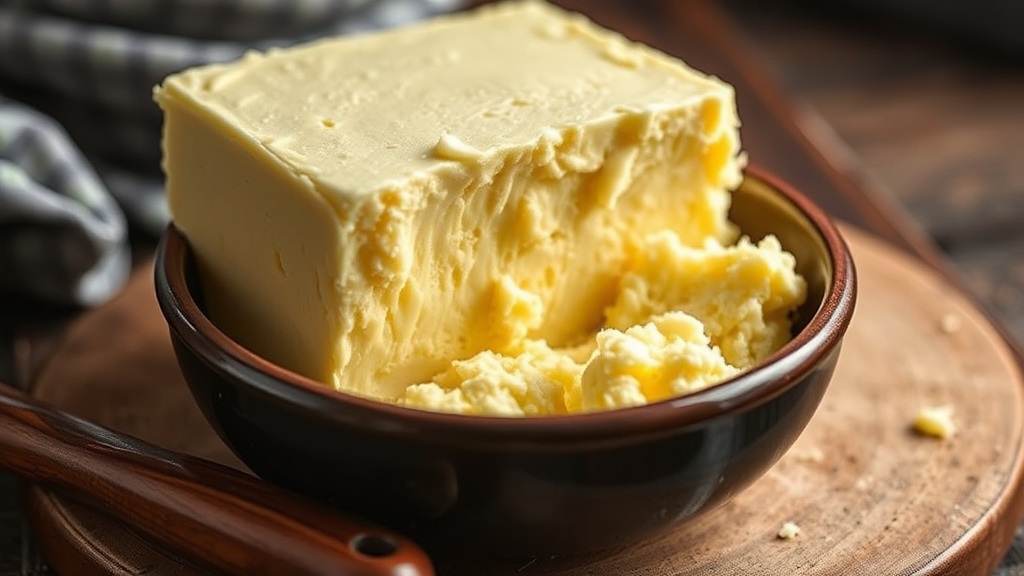
A jar of homemade butter sits on the counter, looking beautiful and pale, until you spread it onto a warm slice of sourdough. Instead of a smooth, silky melt, you find tiny, gritty granules or hard, unyielding lumps that break apart under your knife. This texture issue—often called "graininess"—is a common frustration when moving from store-bought products to artisanal, small-batch making. This guide explains exactly why your homemade butter is failing to reach that creamy consistency and how you can fix your technique to achieve a professional finish.
The Science of Butter Texture
To understand why your butter is grainy, you have to understand what butter actually is. Butter is an emulsion of water droplets suspended within milk fat. When you churn cream, you are physically breaking the membranes of the fat globules so they can clump together. The goal is to create a stable, uniform distribution of fat and a very small, controlled amount of moisture. If that ratio is off, or if the temperature fluctuates during the process, the fat crystals will separate or clump, leading to the unpleasant textures you are seeing.
The Role of Temperature and Crystallization
The most common culprit for lumpy or grainy butter is temperature mismanagement. Fat is highly sensitive to thermal changes. If you are working with cream that is too cold, the fat crystals form too quickly and unevenly, creating hard lumps. If the cream is too warm, the emulsion may break entirely, leaving you with a greasy liquid rather than a solid fat. For a smooth result, you want to aim for a consistent, cool temperature throughout the churning process.
Common Causes of Grainy Butter
1. Inadequate Washing of the Buttermilk
After you finish churning and have separated the solid butter from the liquid buttermilk, the washing stage begins. This is where many home bakers fail. If even a microscopic amount of buttermilk remains trapped within the fat, it will begin to ferment or oxidize. This creates tiny, acidic "pockets" that feel like grit or grains on the tongue. You must wash the butter repeatedly with ice-cold water until the water runs completely clear and there is no scent of sourness remaining.
Pro Tip: Use water that is significantly colder than the butter itself. If the water is even slightly lukewarm, it will begin to melt the fat, leading to a greasy texture rather than a creamy one. I recommend using water straight from a filtered dispenser or adding a few ice cubes to your rinsing bowl.
2. Improper Fat-to-Water Ratio
If your butter feels "heavy" or has large, hard lumps, you likely haven't removed enough moisture. High-quality cultured butter should have a moisture content of around 16% to 18%. If you are making butter from heavy cream, the cream itself contains a high percentage of water. If you don't knead or work the butter thoroughly during the washing phase, that water stays trapped in large pockets, which eventually harden into lumps.
3. Over-Churning or Under-Churning
Timing is everything. If you stop the process too early, the fat hasn't fully coalesced, leaving you with a "slushy" texture. If you go too long, you might actually be over-working the fat, causing it to separate into a greasy mass and a watery liquid that is difficult to recombine. You are looking for that specific moment where the cream "breaks" and turns into solid clumps of yellow fat surrounded by a liquid called buttermilk.
How to Fix Lumpy or Grainy Butter
If you have already finished your batch and realized it is grainy, don't throw it away. You can often rescue the texture using one of the following methods.
The Double Boiler Method (The Smooth Fix)
If your butter is too hard or lumpy to spread, you can gently melt it to reset the crystals. Place your butter in a glass bowl over a pot of simmering water (a double boiler). Do not let the bowl touch the water, and do not let the butter reach a boil. Once it is fully melted, let it cool slowly at room temperature. As it cools, stir it occasionally. This slow cooling helps the fat crystals form in a more uniform, smaller structure, resulting in a much smoother spread.
The Whipped Butter Method (The Aeration Fix)
If the butter is grainy but you don't want to melt it, try whipping it. Use a hand mixer or a stand mixer with a whisk attachment. Add a tiny splash of heavy cream or a teaspoon of water to the bowl and whip on high speed for several minutes. The mechanical action of whipping breaks up the large, gritty crystals and incorporates tiny air bubbles, which can mask the graininess and create a "whipped" texture that is much more pleasant for toast or pastries.
Advanced Techniques for Professional Results
If you want to move beyond basic homemade butter and create something that rivals high-end French cultured butters, you need to focus on the quality of your starting ingredients and the precision of your process.
Culturing Your Cream
The difference between "plain" butter and "cultured" butter is the introduction of bacteria. To get that deep, complex flavor and a smoother texture, you should culture your cream before churning. You can do this by adding a starter culture or even a small amount of high-quality yogurt to your heavy cream and letting it sit at room temperature for 24 to 48 hours. This process develops lactic acid, which not only enhances flavor but also helps stabilize the fat crystals, leading to a more professional mouthfeel. Understanding the nuances of fermentation is much like perfecting your sourdough hydration; it is all about the balance of biology and chemistry.
The Importance of Salt Grain Size
Sometimes, what feels like "grainy butter" is actually just undissolved salt. If you add standard table salt to your butter, the crystals are often too large to dissolve into the fat. This creates a jarring, gritty sensation. For a professional finish, always use a fine sea salt or, better yet, dissolve your salt into a tiny amount of warm water or cream before folding it into the butter. This ensures the seasoning is perfectly integrated and invisible to the palate.
Step-by-Step Checklist for Perfect Homemade Butter
Follow this checklist every time you make a batch to ensure consistency:
- Select High-Fat Cream: Use heavy cream with at least 36% to 40% butterfat. Low-fat cream will result in a watery, unstable emulsion.
- Monitor Temperature: Keep your cream cool, but not freezing. If the cream is too cold, the churning will take much longer and may result in uneven clumps.
- Watch the Break: Stop churning the moment the buttermilk separates from the fat solids.
- Wash Thoroughly: Use ice-cold water. Rinse at least 3-5 times. If the water is even slightly cloudy, keep rinsing.
- Knead the Moisture Out: Use a spatula to press and squeeze the butter against the side of the bowl during the washing phase. This physically forces out the trapped buttermilk.
- Salt with Precision: Use ultra-fine salt or a liquid salt solution to prevent graininess.
Making your own butter is a rewarding way to control your ingredients, but it requires a shift in mindset from "following a recipe" to "managing a physical state." By paying attention to temperature, washing technique, and the way you incorporate salt, you will move from producing lumpy, inconsistent fats to creating a smooth, professional-grade product that elevates everything you bake.
Steps
- 1
Temperature Control
- 2
The Washing Process
- 3
Proper Emulsification