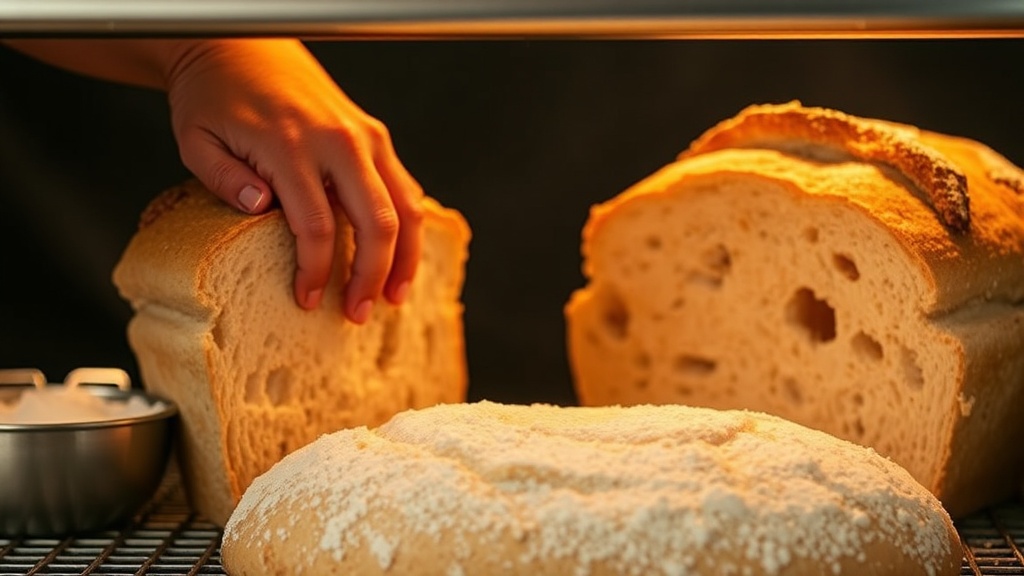
Why Does My Bread Collapse in the Oven? Five Mixing Methods That Actually Build Structure

Most home bakers believe a collapsed loaf means the oven was too hot—or not hot enough. That’s rarely the whole story. The real culprit usually hides much earlier: in how the dough was mixed. Your technique at the mixing stage determines gluten development, gas retention, and ultimately whether your bread holds its shape or slumps into a pancake during the bake.
Think of mixing as the foundation you can’t see. Get it wrong, and even the most precise fermentation schedule won’t save your loaf. Get it right, and you’ll produce bread with volume, open crumb, and that satisfying crackle when you slice into it. Here are five mixing methods that build the structure your bread needs to stand tall.
What Is the Windowpane Test and Why Do Bakers Swear By It?
The windowpane test is the most reliable way to check gluten development without fancy equipment. Take a small piece of dough and stretch it gently between your fingers. If it forms a thin, translucent membrane that doesn’t tear, you’ve reached full gluten development. If it rips immediately, keep mixing.
This test works because gluten proteins—gliadin and glutenin—form a network during mixing. When properly developed, this network traps carbon dioxide produced by yeast, allowing your dough to rise. Underdeveloped gluten can’t hold that gas, which leads to dense crumb or collapse.
Professional bakers use the windowpane test throughout mixing, not just at the end. Check at the three-minute mark, then again at six. You’ll feel the dough transform from shaggy and sticky to smooth and elastic. That tactile feedback is invaluable—especially when you’re working with new flour or adjusting hydration levels.
For high-hydration doughs (think ciabatta or focaccia), the windowpane test looks slightly different. The membrane will be more extensible—less snap, more stretch. That’s fine. You want strength without tightness. A dough that passes the windowpane test but feels like a rubber band will restrict oven spring and produce a tight, closed crumb.
Should I Use Autolyse Before Mixing My Bread Dough?
Autolyse—resting flour and water before adding yeast and salt—might seem like an unnecessary delay. It isn’t. This simple step initiates gluten formation without any mechanical mixing, reducing the time and effort needed later.
During autolyse, enzymes in the flour begin breaking down starches into simple sugars (feeding your yeast later) and proteins start bonding. The result? A dough that handles more smoothly, absorbs water more completely, and develops better flavor. You’ll notice the difference in extensibility—autolysed dough stretches without tearing, ideal for shaped loaves and baguettes.
The standard autolyse lasts 20 to 60 minutes, though some bakers push to 90 minutes for whole grain flours. Don’t add yeast or salt during this phase. Yeast starts producing gas you can’t control, and salt tightens gluten prematurely, defeating the purpose.
One caveat: flours with high enzymatic activity—freshly milled whole wheat, for instance—can over-autolyse. The dough becomes slack and unmanageable. If you’re experimenting with local mill flour, start with 20 minutes and adjust from there. Autolyse isn’t one-size-fits-all, but when matched correctly to your flour, it transforms your mixing experience.
How Does the Rubaud Method Improve Wet Dough Handling?
High-hydration doughs—80% water and above—resist conventional mixing. They’re sticky, shaggy, and seem determined to coat your hands rather than form a cohesive mass. The Rubaud method, named for French baker Gérard Rubaud, solves this problem through a specific scooping and slapping motion.
Here’s how it works: wet your hands (dry hands stick; wet hands glide), scoop under the dough, lift it, and slap it down while folding the trailing end back toward the center. Rotate the bowl a quarter turn and repeat. The motion develops gluten through repeated stretching rather than mechanical beating.
What makes Rubaud mixing effective is how it aligns gluten strands. Each lift and fold organizes the proteins directionally, building strength without the oxidation that comes from extended machine mixing. Over-oxidized dough loses color and flavor complexity—Rubaud preserves both.
This technique shines with ciabatta, pizza dough, and rustic country loaves. Expect to mix for 8 to 12 minutes by hand—longer than a stand mixer would take, but with superior results. Your dough will transform from a wet, shapeless blob into a smooth, organized mass that holds its structure during proofing and baking.
Can I Mix Bread Dough in a Stand Mixer Without Overworking It?
Stand mixers save time, but they introduce risks hand mixing avoids. The hook attachment moves fast, generating heat and incorporating oxygen. Both affect your final loaf—heat accelerates fermentation unpredictably, and oxygen bleaches flavor compounds.
The solution is controlled, intermittent mixing. Start on low speed for the first two minutes, just until ingredients combine. Rest for five minutes—this passive hydration period reduces total mixing time. Then mix on medium-low until you approach full development, finishing by hand.
That final hand-finishing matters. It gives you tactile feedback no machine provides. You’ll feel when the dough smooths out, when resistance increases, when it’s ready. Many collapsed loaves come from mixing entirely by machine, missing those subtle signals.
Temperature control is equally important. Stand mixer bowls warm up during extended mixing. Check dough temperature after five minutes; if it’s creeping past 75°F (24°C), pause and refrigerate the bowl for ten minutes. Cold dough develops gluten more slowly but more stably—rushing the process with heat produces weak, gassy structures that collapse under their own weight.
Why Do Some Recipes Call for Stretch and Folds Instead of Kneading?
Stretch and folds replace continuous mixing with timed, gentle interventions. Every 30 minutes during bulk fermentation, you stretch a portion of dough and fold it over itself. Repeat three to four times. This technique builds structure gradually while preserving the irregular, open crumb artisan bakers prize.
The magic happens in the intervals between folds. While the dough rests, fermentation proceeds. Gluten relaxes. Gas bubbles form and expand. Each subsequent fold reorganizes these bubbles, distributing them evenly without deflating the dough completely. The result is a network of irregular, open holes—distinct from the tight, even crumb of continuously kneaded bread.
Stretch and folds work particularly well with wet doughs that would exhaust you if kneaded traditionally. A 75% hydration sourdough becomes manageable through brief, spaced interactions rather than one marathon session. You’re also less likely to overdevelop the dough, which produces that dreaded tough, rubbery texture.
Timing matters. Perform your first fold when the dough shows slight puffiness—usually 30 to 45 minutes after mixing. Subsequent folds happen at 30-minute intervals. You’ll feel the dough strengthen dramatically between folds three and four. By the final fold, it should hold its shape when you tip the bowl, no longer spreading into a puddle.
Not every bread benefits from this approach. Sandwich loaves and enriched doughs (brioche, challah) need continuous gluten development for their tight, tender crumb. But for rustic European-style breads, stretch and folds often outperform traditional kneading.
Putting It Together: Matching Method to Bread Style
No single mixing method suits every bread. Baguettes demand full gluten development—windowpane test mandatory—achieved through either extended machine mixing or thorough Rubaud technique. Sandwich breads tolerate—and often prefer—the tighter crumb from stand mixer kneading. Artisan sourdoughs shine with stretch and folds that preserve fermentation character.
Your flour choice influences this decision too. Weak flours (low protein, soft wheat) need gentle handling—aggressive mixing tears the fragile gluten network before it forms. Strong bread flours (13%+ protein) can withstand—and often need—more intensive development.
Environmental factors play a role as well. Hot kitchens accelerate fermentation, giving you less time to develop structure through slow methods like autolyse and stretch and folds. Cold spaces slow everything down, extending your timeline but often improving flavor complexity.
The collapsed loaf that started this conversation? Check your mixing first. Was the gluten fully developed? Did you rush the process with heat or over-agitation? Did you match your technique to your hydration level and flour strength? Master these variables, and your bread will stand tall—crust crackling, crumb open, structure sound.
Mixing is where baking becomes craft. It’s the invisible architecture holding everything together. Get curious about your dough. Touch it, stretch it, observe how it changes. That attention—more than any single recipe—will transform your baking.