The Hidden Geometry of Chocolate Ganache

Why Ganache Breaks and How to Fix It
A single degree of temperature difference can turn a silky, luxurious ganache into a grainy, separated mess. While most people think of chocolate and cream as a simple two-ingredient pairing, the chemistry happening inside that bowl is actually a complex emulsion of fat and water. When a ganache breaks, it isn't just a visual failure; it's a structural one where the fat has separated from the liquid, leaving you with a greasy, unappealing texture. Understanding the physics of this emulsion is the difference between a professional finish and a kitchen disaster.
The process starts with the ratio. If you've ever tried to make a glaze for a cake and ended up with a puddle of oil, you likely missed the mark on your liquid-to-fat ratio. Cocoa butter is a highly sensitive fat. It wants to stay suspended in the liquid, but heat and agitation can easily disrupt this balance. If your ganache looks like it has tiny beads of oil floating on the surface, you've hit a point of instability. This often happens when the chocolate is too hot or when the cream is added too quickly, shocking the fats.
To prevent this, think of your ganache as a delicate sculpture. You aren't just stirring ingredients; you're building a structure. Many bakers rely on the King Arthur Baking principles of temperature control to ensure their emulsions stay stable. If your emulsion fails, don't toss it. You can often rescue it by adding a tiny bit of warm liquid or by using an immersion blender to force the fat back into the emulsion. It's a physical process of re-incorporation that requires patience rather than force.
What is the Best Ratio for Chocolate Ganache?
There isn't one single "perfect" ratio, because the goal dictates the recipe. If you're making a pourable glaze for a shiny mirror glaze, you'll want more liquid (cream) relative to the chocolate. If you're making a stiff truffle filling, you'll want a higher percentage of chocolate. For a standard, versatile ganache that works for both dipping and filling, a 1:1 ratio by weight is a reliable baseline. However, if you're working with high-percentage dark chocolate, you might need to adjust the cream to account for the higher cocoa butter content.
Consider these common ratios for different textures:
- Pourable Glaze: 1 part chocolate to 2 parts heavy cream (for a thinner, more fluid consistency).
- Standard Filling: 1 part chocolate to 1 part heavy cream (the classic truffle base).
- Firm Frosting: 2 parts chocolate to 1 part heavy cream (for stability at room temperature).
When working with different types of chocolate, remember that white chocolate and milk chocolate have much lower cocoa solids and higher milk fat. This means they behave differently under heat. You'll often need more cream with dark chocolate to keep it stable, whereas white chocolate can become quite unstable if the heat isn't controlled strictly. It's a balancing act of solids and liquids that requires a keen eye and a steady hand.
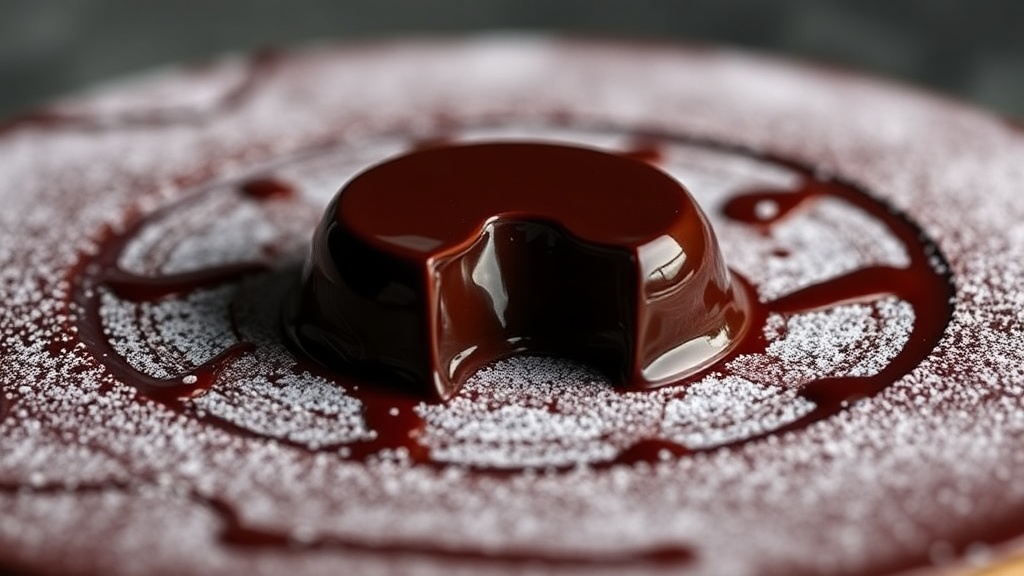
How Do I Make Ganache Shiny?
That high-gloss, mirror-like finish seen in high-end pastry shops isn't an accident; it's a result of controlled emulsification and the inclusion of specific ingredients. One of the most effective ways to achieve a professional shine is by incorporating a small amount of glucose syrup or corn syrup. This adds a level of viscosity and prevents the surface from drying out too quickly, which can cause a dull, matte finish. If you're looking for more technical details on ingredient functions, the Exploratorium offers wonderful insights into the physical properties of food.
Another trick is the temperature of the cream. You don't want it boiling—that's a common mistake. Boiling cream can scorch the milk solids and actually break the emulsion. You want it just hot enough to melt the chocolate on contact. Once the chocolate has melted, use a gentle, circular motion to stir. Avoid whisking vigorously; too much air creates bubbles, and those tiny bubbles will sit on the surface, ruining the smooth, reflective quality you're aiming for. A spatula or a rubber spoon is often better than a whisk for this specific task.
The Role of Temperature in Stability
Temperature is your most important tool, but it can also be your greatest enemy. If you pour a hot ganache over a cold cake, the thermal shock can cause the chocolate to seize or the fat to separate immediately. The ideal temperature for a pourable ganache is usually around 32°C to 35°C (90°F to 95°F). At this temperature, it has enough fluidity to move but enough body to coat the surface smoothly. If it's too hot, it will be too thin and run off the sides of your cake like water.
For those who want to experiment with different flavors, adding a small amount of room-temperature butter at the very end of the process can add a beautiful sheen and a richer mouthfeel. This is a common technique in French pastry, where the butter helps to 'set' the emulsion and provides a luxurious texture. Just ensure the butter is at room temperature to avoid introducing cold spots into your warm ganache. A little bit of precision goes a long way in turning a simple recipe into a piece of edible art.