Six Alternatives to a Dutch Oven for Baking Crusty Bread at Home

You Don't Need a Dutch Oven to Bake Professional-Quality Bread
This post covers six methods for baking crusty artisan bread at home without investing in a heavy cast-iron Dutch oven. You'll learn how to create steam-filled baking environments using equipment you already own—sheet pans, roasting pans, hotel pans, and even cast-iron skillets. Each method produces different crust characteristics, and by the end, you'll know which technique matches your bread style and kitchen setup.
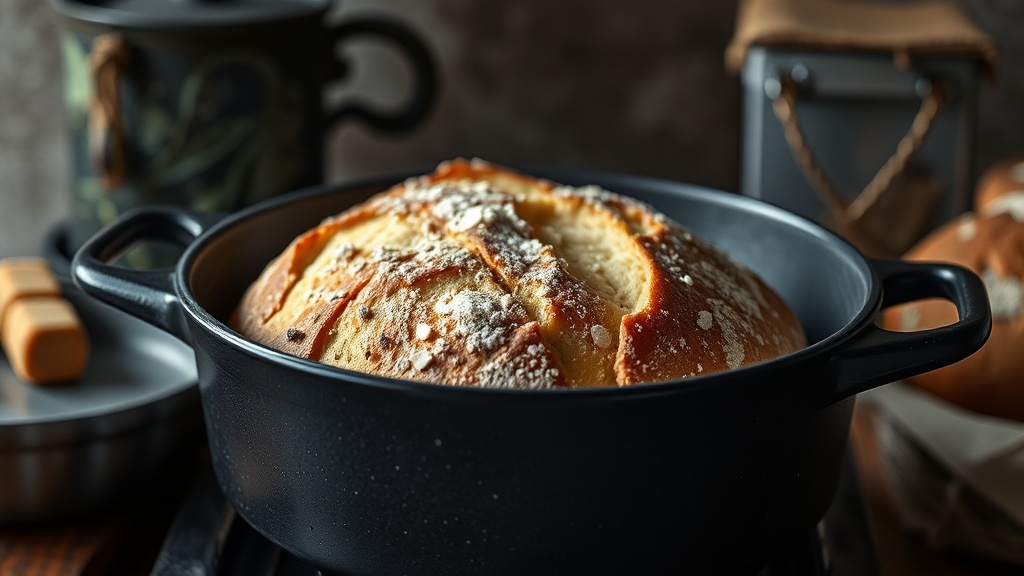
The Dutch oven has become synonymous with home bread baking, and for good reason. Its thick walls retain heat, and the enclosed chamber traps steam released by the dough—keeping the crust soft during the initial expansion phase so the loaf can reach its full volume before the crust hardens. But not everyone has one. They're expensive, heavy, and often too small for larger loaves. The good news? Professional bakeries don't use Dutch ovens. They use steam-injected ovens, which means we can replicate those conditions at home with some creative equipment combinations.
What Can I Use Instead of a Dutch Oven for Bread?
The key isn't the pot itself—it's the steam. Professional ovens inject steam during the first 10-15 minutes of baking. This moisture gelatinizes the starches on your dough's surface, creating that glossy, crackly crust we associate with artisan loaves. Without steam, your bread crust sets too quickly, restricting expansion and producing a dull, thick exterior. Any method that traps steam around your loaf during the initial bake will work.
1. The Roasting Pan Method
A covered roasting pan—aluminum or stainless steel—functions almost identically to a Dutch oven. The rectangular shape actually accommodates longer batards better than round Dutch ovens. Preheat the pan and lid together at 475°F (246°C) for at least 30 minutes. Transfer your shaped loaf onto parchment, score it, then carefully lower it into the hot pan. Cover immediately and bake for 20 minutes. Remove the lid for the remaining 20-25 minutes to develop color.
The aluminum conducts heat faster than cast iron, so the bottom crust develops more quickly—sometimes too quickly. If your bottoms are burning before the top browns, double up on sheet pans underneath or slide a baking stone on the rack below to diffuse the heat. The lighter weight makes this method more manageable for those who struggle with lifting heavy cast iron.
2. The Hotel Pan and Lid Combo
Restaurant supply stores sell stainless steel hotel pans in standard sizes. A 13×18 inch full-size pan with a matching lid creates an excellent bread-baking chamber. The large surface area accommodates multiple loaves or one large miche. The shallow sides (2.5 inches) mean easier loading compared to deep Dutch ovens—you're less likely to burn your forearms on the rim.
Heat the pan and lid upside down (the lid becomes the base) at 450°F (232°C) for 30 minutes. Transfer your dough, cover with the hotel pan, and bake covered for 15-20 minutes. The stainless steel doesn't retain heat as long as cast iron, so you'll want to extend the covered phase slightly—closer to 25 minutes for maximum oven spring. This method shines when you're baking for a crowd.
How Do I Create Steam in a Regular Oven?
If you don't have any covered pan large enough, you can add steam to your oven environment using the pan-and-ice method. This mimics professional steam-injection systems without specialized equipment. Place a heavy sheet pan or cast-iron skillet on the bottom rack while preheating. Slide your bread onto a baking stone or steel on the middle rack. Immediately after loading, pour one cup of boiling water into the hot pan on the bottom, then quickly close the door.
The water flash-evaporates, filling the oven with steam. For sustained steam—better for long-fermented sourdoughs—add several ice cubes instead of boiling water. They melt slowly, releasing steam over 10-15 minutes rather than all at once. Some bakers use lava rocks or stainless steel chain mail in the preheated pan—the increased surface area creates more steam from the same amount of water. Be careful: pouring water into a hot pan can warp thinner aluminum sheet pans over time.
3. The Cast-Iron Skillet with Bowl Cover
This hybrid method uses what many home cooks already own—a 12-inch cast-iron skillet and a large stainless steel mixing bowl. Preheat both at 475°F (246°C). Transfer your dough into the hot skillet, then invert the bowl over the top. The bowl acts as a cloche, trapping steam against the loaf's surface.
The advantage here is control. After 15 minutes, you can lift the bowl (use tongs and oven mitts—the bowl handle gets hot) to check spring and color development. The exposed top browns faster than enclosed methods, so you'll typically need to tent with foil during the final 10 minutes to prevent over-browning while the interior finishes. This method produces a slightly thinner, shattering crust compared to the thick, leathery crust from enclosed Dutch ovens.
4. The Clay Baker or Romertopf
Unglazed clay bakers—like the German Romertopf or La Cloche—were bread-baking staples before Dutch ovens became trendy. The porous clay absorbs water from the dough and releases it slowly as steam. Soak the top and bottom in water for 15 minutes before preheating. The evaporating water from the clay itself supplements the steam from the dough.
These produce the most dramatic oven spring of any method here. The clay stays cooler than metal, so the crust sets more slowly, allowing maximum expansion. The resulting crumb has more open structure and the crust develops that distinctive mottled, artisan appearance. The downside: clay is fragile. Thermal shock from cold dough hitting hot clay can crack it, and preheating empty clay (as many instructions recommend) stresses the material. Always start with a room-temperature clay baker and extend the preheat time.
Why Is My Bread Crust Soft Instead of Crispy?
A soft crust after cooling usually means insufficient steam during the initial bake—or too much steam throughout. If your crust stays pale and rubbery, you need more steam in the first 10 minutes. If it turns leathery and soft after initially crisping, your bread needs more uncovered baking time to dry the crust completely. The balance is critical: steam early for expansion, dry heat late for texture.
Some flours also produce softer crusts. Whole grain and rye breads have less gluten and more natural sugars, creating softer exteriors regardless of technique. For crispier crusts on these breads, extend the uncovered baking phase or finish with the oven door propped slightly open (using a wooden spoon) for the final 5 minutes to release residual moisture.
5. The Pizza Steel and Inverted Sheet Pan
Pizza steels (or baking stones) store massive thermal mass, giving your bread the hot floor it needs for bottom crust development. Pair one with an inverted sheet pan placed over the loaf, and you've created a makeshift covered chamber. The sheet pan doesn't seal perfectly—some steam escapes—but this actually works well for wetter doughs that release substantial moisture.
Preheat the steel and sheet pan at 500°F (260°C) for 45 minutes. Transfer your dough, cover with the inverted sheet pan, and reduce to 450°F (232°C). Bake covered for 20 minutes, then remove the pan and finish at 425°F (218°C) for even browning. This method excels for ciabatta and other high-hydration loaves—the imperfect seal prevents the crust from getting too thick and chewy.
6. The Covered Casserole Dish with Lava Rocks
Any oven-safe pot with a lid works here—Pyrex, ceramic casserole dishes, even enamelware. The material matters less than the steam generation. Place your loaf in the covered dish, but add a separate steam source: a small ramekin with 2-3 ice cubes placed beside (not touching) the dough. The ice melts slowly, releasing steam throughout the covered phase.
Pyrex offers a unique advantage: you can see the oven spring happening. Watching your slashes bloom open in real-time helps you learn how proofing levels affect expansion. Ceramic dishes retain heat well but can crack with thermal shock—always preheat gradually and avoid cold dough on hot ceramic. This method produces the most consistent results for beginners because the visual feedback teaches you timing.
Each method produces slightly different results. Metal pans create thinner, cracklier crusts. Clay and ceramic produce thicker, chewier exteriors with more rustic appearance. Your flour type, hydration level, and personal preference should guide your choice. Start with whatever equipment you already own before investing in specialized gear—the best bread comes from understanding your tools, not from owning the most expensive ones.
Sources and Further Reading
For deeper understanding of oven spring and steam mechanics, consult King Arthur Baking's guide to steam in bread baking. The Serious Eats pizza steel review includes excellent thermal mass explanations applicable to bread. For clay baker techniques, Breadtopia's clay pot baking tutorial covers preheating methods and hydration levels specific to unglazed ceramic.