Mastering the Art of Sourdough: A Beginner's Complete Guide

This comprehensive guide covers everything needed to start baking sourdough bread at home, from cultivating a starter to achieving that perfect ear on the final loaf. Learning sourdough fundamentals opens the door to naturally leavened bread with superior flavor, texture, and digestibility compared to commercial yeast alternatives. Whether the goal is weekly sandwich loaves or artisan boules worthy of a Pointe-Saint-Charles farmers market stall, these techniques provide the foundation for consistent results.
Understanding Sourdough Fermentation
Sourdough relies on wild yeast and lactic acid bacteria rather than packaged Saccharomyces cerevisiae. This symbiotic culture, often called a starter or levain, captures microorganisms from flour and the surrounding environment. In Montréal's climate—particularly during the humid summer months—the fermentation process moves faster than in drier regions. A starter maintained at 22°C (72°F) typically requires feeding every 12 hours, while winter temperatures below 18°C (65°F) may extend this to 18-24 hours.
The fermentation process breaks down complex carbohydrates and gluten proteins. Studies from the University of Alberta show that sourdough fermentation reduces phytic acid content by up to 62%, making minerals like iron and zinc more bioavailable. The lactic acid bacteria also produce organic acids that create the characteristic tangy flavor while naturally preserving the bread.
Building a Starter from Scratch
A healthy starter requires only two ingredients: flour and water. The process takes 7-14 days of consistent attention before the culture stabilizes enough for bread baking.
Day-by-Day Starter Development
Days 1-3: Combine 50g whole wheat flour with 50g room-temperature water (21°C/70°F) in a clear glass jar. Whole wheat provides more nutrients than all-purpose flour during this initial phase. Stir vigorously to incorporate oxygen, cover loosely, and let rest at room temperature. Discard half and feed with 50g flour and 50g water every 24 hours.
Days 4-7: Bubbles should appear, along with a sour or fruity aroma. Switch to a 1:1:1 ratio by weight—discard all but 50g starter, then feed with 50g unbleached all-purpose flour and 50g water. Feed every 12 hours now, as activity increases.
Days 8-14: The starter should double in volume within 4-6 hours of feeding and pass the "float test"—a teaspoon of starter floating in water indicates readiness for baking. At this stage, transition to maintenance feeding with a 1:2:2 ratio (50g starter, 100g flour, 100g water) for a more predictable rise schedule.
Essential Equipment
Sourdough baking requires minimal specialized tools, though certain items improve results significantly:
- Kitchen scale: Precision matters. A digital scale measuring to the gram, such as the OXO Good Grips model ($56 CAD at Canadian Tire), eliminates the inconsistency of volume measurements.
- Dutch oven: The Lodge 5.5-quart enameled cast iron pot ($120 CAD) traps steam during the initial bake, creating the crispy, caramelized crust impossible to achieve in a standard oven.
- Banneton baskets: These woven proofing baskets, typically $25-40 CAD from retailers like Ricardo Cuisine, create the characteristic spiral pattern on finished loaves and support the dough during final proofing.
- Bench scraper: A metal scraper ($12-18 CAD) assists with dividing and shaping dough without incorporating excess flour.
- Lame: A razor blade scoring tool ($15-25 CAD) creates clean cuts that control oven spring and create visual appeal.
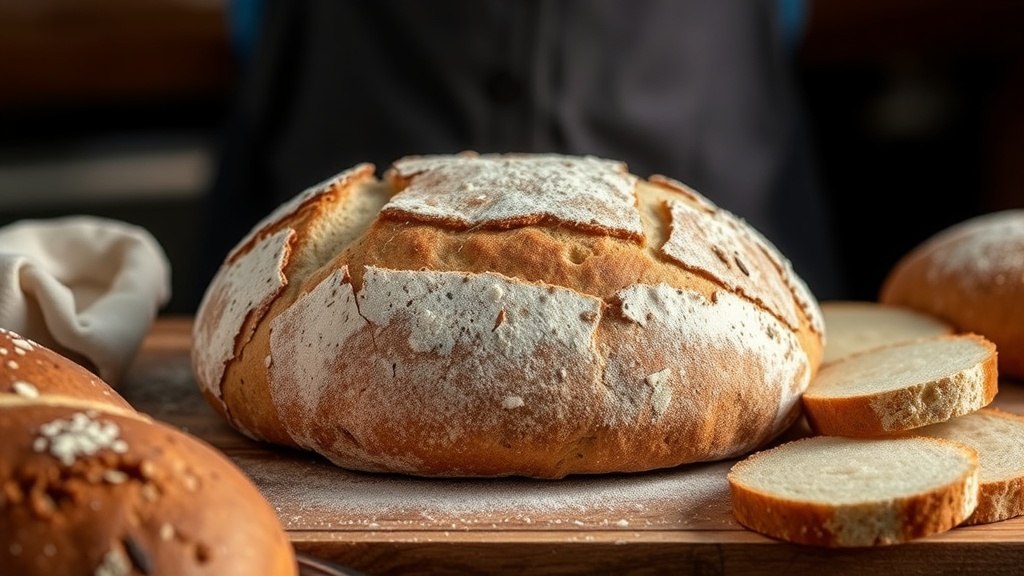
The Basic Sourdough Formula
This versatile recipe produces one 900g boule or batard, suitable for beginners yet adaptable for experienced bakers.
Ingredients
- 500g bread flour (Robin Hood or Five Roses Canadian bread flour, 13.3% protein)
- 325g water at 28°C (82°F)—65% hydration
- 100g active starter (fed within 4-6 hours, bubbly and doubled)
- 10g fine sea salt (approximately 2 teaspoons)
Method
Autolyse (1 hour): Mix flour and water until just combined. Rest covered. This hydration period allows gluten development to begin without mechanical mixing, resulting in better extensibility and open crumb structure.
Mix (10 minutes): Add starter and salt to the autolysed dough. Squeeze and fold until fully incorporated. The dough should feel cohesive but sticky—resist adding extra flour.
Bulk Fermentation (4-6 hours at 24°C/75°F): Perform four sets of stretch and folds at 30-minute intervals. For each set, wet hands, grab one side of the dough, stretch upward, and fold toward the center. Rotate the bowl 90 degrees and repeat three more times. Cover between sets. The dough is ready when it has increased in volume by 50-70%, feels lighter and airier, and shows visible bubbles on the surface.
Pre-shape (20 minutes): Gently ease the dough onto an unfloured counter using a wet bench scraper. Shape into a loose round, cover with a damp towel, and let rest. This bench rest relaxes the gluten for final shaping.
Final Shape: Flip the pre-shaped dough, fold the bottom third up, fold each side toward the center, then roll from the top into a tight cylinder. Place seam-side up in a floured banneton basket.
Cold Proof (12-24 hours): Cover the banneton with a shower cap or plastic bag and refrigerate. This retarded fermentation develops complex flavor through slow bacterial activity while making the dough easier to score.
Bake: Preheat Dutch oven at 245°C (475°F) for 45 minutes. Invert cold dough onto parchment paper, score with a lame at a 45-degree angle, and lower into the hot pot. Cover and bake 20 minutes. Remove lid, reduce to 230°C (450°F), and bake 20-25 minutes until the crust reaches a deep mahogany color and internal temperature hits 98°C (208°F).
Troubleshooting Common Issues
Dense Crumb with Large Holes
This classic beginner problem indicates under-fermentation. The dough lacked sufficient time for wild yeast to produce adequate carbon dioxide. Solution: extend bulk fermentation by 30-60 minutes, watching for proper volume increase (50-70%) rather than following the clock rigidly. In winter, proofing boxes or the oven with the light on can maintain warmer temperatures.
Flat Loaf with No Oven Spring
Over-proofing causes the gluten structure to weaken and collapse. The dough feels slack and unresponsive during shaping. Solution: reduce cold proof time to 8-12 hours, or perform the "poke test" before baking—press a floured finger into the dough. Properly proofed dough springs back slowly and partially. If it stays indented, the dough is over-proofed.
Excessively Sour Flavor
Acetic acid production dominates when starters are kept in cool temperatures or fed infrequently. For a milder flavor, feed the starter twice daily at room temperature for two days before baking, or use a smaller percentage of starter (80g instead of 100g) to slow fermentation and favor milder lactic acid production.
Storing and Maintaining a Starter
Active bakers keep starters at room temperature, feeding daily. For occasional baking, refrigerate the starter after feeding. Cold storage slows metabolism significantly—weekly feeding suffices. Before baking, remove the starter from refrigeration, discard (or use in pancakes or crackers), and feed twice at 12-hour intervals to reactivate full vigor.
Starter discard—the portion removed during feeding—need not go to waste. It adds tangy flavor to chocolate cake, waffles, pizza dough, and crackers. Store discard in a separate jar in the refrigerator for up to two weeks.
Advancing Your Technique
Once comfortable with the basic formula, experimentation opens new possibilities. Increasing hydration to 75-80% creates a more open, irregular crumb typical of Tartine-style loaves. Adding 10% whole grain flour (rye, spelt, or einkorn) introduces nutty flavors and additional nutrition. Montreal-area millers like Moulin des Cèdres in the Eastern Townships produce heritage wheat varieties that yield distinctive regional character.
Scoring patterns transform functional bread into edible art. A single deep slash creates the classic "ear"—a raised ridge of crust. Multiple parallel cuts or wheat stalk patterns require practice but impress at dinner parties. Cold dough from the refrigerator scores more cleanly than room-temperature dough.
"Sourdough is not about perfection. It is about understanding fermentation as a living process and responding to what the dough communicates. Each loaf teaches something new."
Patience and observation matter more than expensive equipment. A simple starter, quality flour, and attention to temperature and timing produce bread that rivals any artisan bakery. The journey from first mix to first slice spans days, but the skills developed serve a lifetime of baking.