How to Make a Perfect Sourdough Starter from Scratch in 7 Days

A sourdough starter is the living foundation of every great loaf—wild yeast and bacteria working together to leaven bread and create that signature tang. This guide walks through a proven 7-day method for building a starter from nothing but flour and water. No commercial yeast. No fancy equipment. Just patience and the right technique. By day seven, you'll have a bubbly, active culture ready to bake its first loaf.
What do you need to make a sourdough starter?
You need exactly two ingredients and two tools. That's it.
The flour: Unbleached all-purpose works fine. Whole wheat or rye? Even better—they contain more wild yeast and nutrients to kickstart fermentation. Many bakers swear by King Arthur Baking Company's whole wheat flour for day one. Others prefer Bob's Red Mill rye. Either way, avoid bleached flour (the chemicals slow fermentation).
The water: Tap water is fine in most cities. If your water is heavily chlorinated, let it sit out overnight or use filtered. The chlorine won't kill the starter, but it can slow things down.
The container: A glass jar—wide-mouth Mason jars are perfect—lets you see bubbles and activity. Avoid metal (reactive with acids) and make sure there's room for the starter to triple in size.
The scale: Digital kitchen scales are non-negotiable for consistent results. The OXO Good Grips Stainless Steel Scale measures in grams and handles the small quantities you'll be working with. Volume measurements (cups) are too imprecise—starters are finicky about ratios.
| Item | Best Option | Budget Alternative | Why It Matters |
|---|---|---|---|
| Flour (Days 1-3) | King Arthur Whole Wheat | Any unbleached all-purpose | More nutrients = faster colonization |
| Flour (Days 4-7) | King Arthur Bread Flour | Store-brand unbleached AP | Higher protein feeds yeast long-term |
| Water | Filtered, room temp | Dechlorinated tap | Chlorine inhibits initial growth |
| Container | Wide-mouth 24oz Mason jar | Clean pickle jar | Glass won't react; easy to clean |
| Scale | OXO Good Grips Digital | Amazon Basics Kitchen Scale | Precision matters for ratios |
How long does it actually take to make a sourdough starter?
Seven days minimum—sometimes ten or twelve depending on your kitchen temperature.
Here's the thing: starters don't follow your schedule. They follow temperature, humidity, and the specific wild yeast floating around your kitchen. A starter in a 75°F kitchen will outpace one sitting at 68°F by days. The process below assumes room temperature around 70-72°F.
Day one through three are deceptively quiet. The starter might bubble a bit, then go flat. That's normal—you're cultivating bacteria first (the sour smell), then yeast follows. Days four through six is where the magic happens. By day seven, predictable doubling within 4-6 hours of feeding is your green light.
The 7-Day Schedule
Day 1: Mix 50g whole wheat flour + 50g water. Stir until no dry flour remains. Scrape down sides. Cover loosely (cloth or lid cracked). Leave at room temperature 24 hours.
Day 2: You might see a few bubbles. Maybe not. Either way, discard all but 50g of the mixture. Add 50g all-purpose flour + 50g water. Mix, scrape, cover. Rest 24 hours.
Day 3: Bubbles should appear. The smell? Like vinegar or gym socks. That's the bacteria working—good signs. Discard all but 50g. Feed 50g AP flour + 50g water. Rest 24 hours.
Day 4: More bubbles, more rise. The starter might double by now. Discard all but 50g. Feed 50g AP flour + 50g water. Here's the thing—if it's rising and falling within 12 hours, you can switch to twice-daily feedings (morning and night) to build strength faster.
Day 5: Switch to twice-daily feedings if you haven't already. Discard all but 50g. Feed 50g AP flour + 50g water. Repeat every 12 hours. The starter should double reliably now.
Day 6: Continue twice-daily feedings. The starter should smell pleasant—yeasty, slightly tangy, like beer or overripe fruit. If it smells like nail polish remover (acetone), that's hungry yeast. Feed it.
Day 7: Test day. Feed as usual. The starter should double within 4-6 hours and pass the float test—drop a spoonful in water; if it floats, you're ready to bake.
Why isn't my sourdough starter rising?
Temperature is the usual culprit—yeast slows dramatically below 65°F and races above 80°F.
That said, there are other common issues. Too much chlorine in water can stall day-one activity. (The fix? Switch to filtered.) Inconsistent feeding times confuse the culture. (The fix? Set phone reminders.) Using bleached flour can inhibit growth. (The fix? Switch to unbleached—seriously, this matters.)
The catch? Sometimes a starter looks dead when it's just resting. Days two and three often show minimal activity while bacteria establish the environment yeast needs. Don't panic. Keep feeding. Keep waiting.
If day five hits and there's zero bubbling, zero rise, and it smells like paint? Start over. Bad flour, bad water, or wrong temperatures killed it. This happens. Sourdough starters are resilient but not invincible.
Reading the Signs
Hooch: That dark liquid pooling on top? It's alcohol—yeast waste. Stir it in (sour flavor) or pour it off (milder). Then feed immediately. Hooch means your starter is hungry, not dead.
Mold: Fuzzy patches—white, green, pink, orange—mean contamination. Toss the whole thing. No scraping, no saving. Serious Eats has excellent photos of what mold looks like versus harmless starter discoloration.
The "False Start": Days one through three might show wild bubbling that suddenly stops. That's leuconostoc bacteria—harmless, but not the yeast you want. Keep feeding. The yeast will take over.
What ratios should you use for feeding?
Equal parts starter, flour, and water by weight—that's 1:1:1 ratio.
Once the starter is mature (after day seven), you can adjust. Want it ready faster? Feed 1:2:2 (starter:flour:water). Hungry for more sourness? Drop hydration to 75% (equal starter and flour, 75% water by flour weight). The standard 1:1:1 keeps things simple and predictable for beginners.
Worth noting: some bakers maintain "stiff" starters (50% hydration) for specific breads. Others keep "liquid" starters (125% hydration). For your first loaf, stick with 100% hydration—equal weights flour and water. It's forgiving, easy to mix, and behaves predictably in recipes.
Storage After Day Seven
Keep baking daily? Leave it on the counter. Feed twice daily. Most home bakers don't bake that often.
For weekly baking: feed the starter, let it double, then refrigerate. It'll sleep for a week, sometimes two. Pull it out 12-24 hours before baking, feed it twice to wake it up, then use.
Neglected starters can survive months in the fridge. The hooch gets thick. The smell gets sharp. Revive with twice-daily feedings for 2-3 days—discard, feed, repeat—until it doubles predictably again.
When can you bake your first loaf?
Day seven or eight—assuming the starter doubles within 4-6 hours and passes the float test.
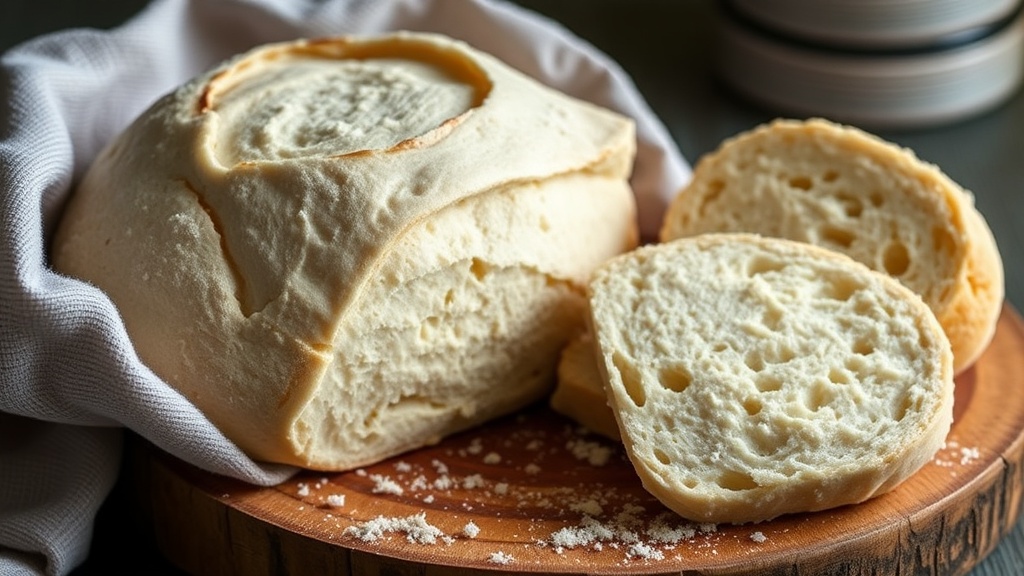
Start with a simple recipe. King Arthur's Extra-Tangy Sourdough is forgiving and well-tested. Avoid complicated multigrain or high-hydration recipes for your first bake. You want to isolate variables—if the loaf fails, it shouldn't be because the recipe was tricky.
Your first loaf might be flat. Dense. Too sour. That's information, not failure. Sourdough rewards repetition. Each bake teaches you something about timing, temperature, and technique.
The starter you built? It's a living thing now—unique to your kitchen, your flour, your hands. Keep it fed. Keep it warm. It'll outlast your patience if you let it.
Steps
- 1
Mix equal parts flour and water to begin fermentation
- 2
Feed your starter daily, discarding half each time
- 3
Watch for bubbles and doubling to know it's active