Cold Fermentation: The Secret to Deeper Brioche Flavor Without the Same-Day Stress

What Happens to Brioche During an Overnight Cold Ferment?
Here's something that might surprise you: a brioche dough left to ferment in the refrigerator for 24 to 48 hours develops roughly 40% more complex flavor compounds than one baked the same day it was mixed. That slow, chilly transformation isn't just about convenience (though skipping the "will it rise in time?" anxiety is lovely). It's about biochemistry doing what heat simply can't. When you slow down fermentation, the wild yeasts and bacteria in your dough produce organic acids, alcohols, and esters at a pace that allows deeper, more nuanced flavors to develop. Think of it like the difference between a quick sketch and an oil painting with layers of glaze. Both have merit. But one has depth.
This guide covers everything you need to know about cold-fermenting brioche at home. You'll learn why the refrigerator is your secret weapon for flavor, how to time the process without over-proofing, and what visual cues tell you the dough is ready. Whether you're shaping burger buns, a tressé for Sunday brunch, or individual rolls for an afternoon tea spread, these techniques will change how you approach enriched doughs.
Why Does Cold Temperature Change Brioche's Texture and Taste?
Let's break down what's actually happening inside that chilled bowl. Yeast activity slows dramatically below 40°F (4°C), but it doesn't stop entirely. What does stop is the runaway expansion that can leave you with dough creeping over the bowl rim at 2 AM. The cold puts the yeast into a sleepy, steady rhythm. Meanwhile, enzymes in the flour keep working. Amylase breaks starches into sugars. Protease gently relaxes gluten strands. This enzymatic activity is the real hero of cold fermentation, and it happens regardless of yeast speed.
The result? A dough that's easier to shape (thank you, relaxed gluten), more flavorful (those converted sugars caramelize beautifully in the oven), and surprisingly more shelf-stable. The acids produced during slow fermentation act as natural preservatives. Your brioche stays moist for days rather than hours. Professional bakeries have known this for generations. That's why your favorite Montreal patisserie's brioche tastes different (better) than rushed home versions. They're not using magic ingredients. They're using time.
"The cold is not your enemy in bread baking. It's a different kind of heat—a slower kind of fire." — Nancy Silverton, Breads from the La Brea Bakery
The butter content in brioche (typically 20-50% of flour weight by professional standards) behaves differently in cold dough too. Chilled butter firms up, creating distinct layers within the dough structure. When baked, these pockets of fat steam and create the tender, feathery crumb that defines great brioche. Warm butter, by contrast, integrates too thoroughly. You get richness without that ethereal lightness.
How Long Should You Cold-Ferment Brioche Dough?
Timing depends on your yeast percentage and refrigerator temperature. Here's a practical framework:
| Yeast Amount (Fresh) | Refrigerator Temp | Minimum Cold Ferment | Maximum Before Baking |
|---|---|---|---|
| 10g per 500g flour | 38°F / 3°C | 12 hours | 48 hours |
| 15g per 500g flour | 38°F / 3°C | 8 hours | 36 hours |
| 10g per 500g flour | 34°F / 1°C | 18 hours | 72 hours |
Notice the range. Brioche is forgiving. That 48-to-72-hour window is where the magic happens for flavor development. Past 72 hours, the protease activity can break down gluten too aggressively. Your dough becomes slack and difficult to shape. It still bakes, but you lose that beautiful tension that helps brioche hold its form.
I've found the sweet spot for home baking sits between 18 and 30 hours. Mix the dough Saturday evening after dinner. Shape Sunday morning. Bake before lunch. The timing works with real life rather than against it. No setting alarms to punch down dough. No timing your entire day around a warm kitchen.
What Visual Signs Tell You Cold-Fermented Brioche Is Ready?
Cold dough looks different than room-temperature proofed dough. Learn these cues and you'll never second-guess yourself again.
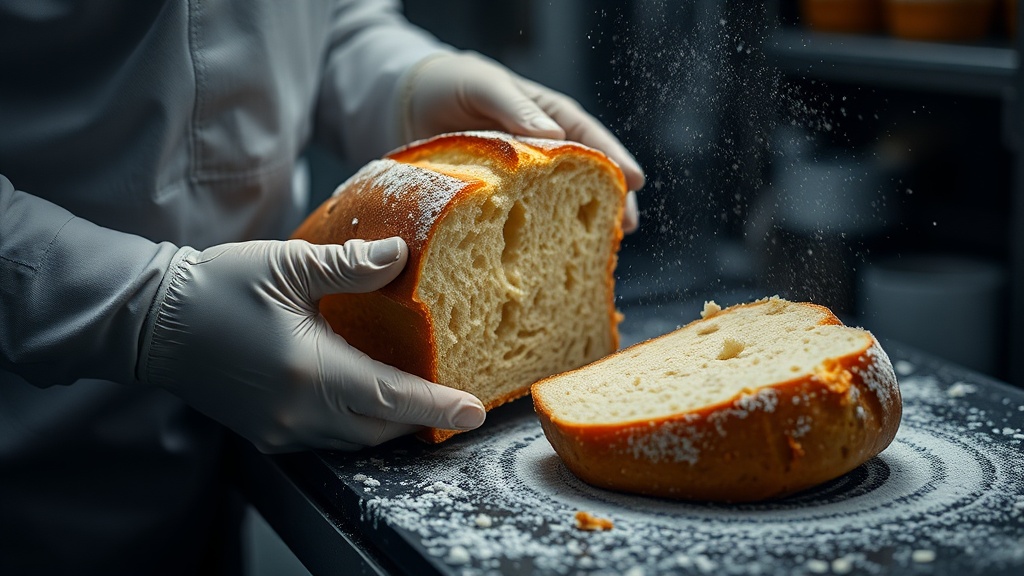
Volume increase: Expect roughly 50-70% expansion—not the doubling you'd see in a warm kitchen. The cold suppresses gas retention. Don't wait for the bowl to overflow. That's over-proofed territory.
Surface bubbles: Small blisters on the dough surface indicate active fermentation. These aren't flaws. They're flavor pockets waiting to happen.
The poke test—modified: Cold dough feels firmer. Press a floured finger 1/2 inch into the surface. It should spring back slowly, leaving a small indentation. If it springs back immediately, it needs more time. If it stays depressed, move quickly to shaping.
Aroma: This is where your art school background serves you well. Think of scent as color. Same-day brioche smells yeasty, sweet, one-note. Cold-fermented dough has complexity—buttery notes, subtle tang (like distant citrus), a hint of nuttiness. If you detect sharp vinegar or alcohol, you've pushed too far. The dough isn't ruined. Punch it down, reshape, and let it warm briefly before baking. But know that maximum flavor has passed.
Can You Freeze Brioche Dough After Cold Fermentation?
Absolutely. And this is where meal prep meets artisan baking. After your cold fermentation (anywhere in that 12-72 hour window), portion and shape the dough into your desired forms—rolls, loaves, individual buns. Freeze them solid on a baking sheet, then transfer to freezer bags. They'll keep beautifully for six weeks.
The thawing process becomes a second, gentler fermentation. Move frozen shaped dough to the refrigerator overnight. The slow thaw mimics the cold ferment all over again. By morning, the rolls have proofed just enough. Let them sit at room temperature for 30-45 minutes while your oven preheats. Brush with egg wash, sprinkle with pearl sugar or sesame seeds if desired, and bake.
This approach is how small bakeries manage morning inventory without 3 AM mixing shifts. The dough does the work while everyone sleeps. For home bakers, it means fresh brioche on Wednesday morning with Sunday afternoon effort. That math works.
Practical Tips for Your First Cold-Fermented Brioche
- Use a container with room to grow. Even cold dough expands. Leave 30% headspace in your bowl or container.
- Cover tightly but not airtight. Plastic wrap pressed directly to the dough surface prevents a skin. A loose lid on a container works too. You want to block refrigerator odors without creating a pressure situation.
- Label with time and date. Enthusiasm fades. "Did I mix this Thursday or Friday?" is not a fun guessing game at 7 AM.
- Don't skip the bench rest after cold fermentation. Cold dough is stiff. Let it sit at room temperature for 20-30 minutes before attempting to shape. Your hands will thank you, and the gluten will relax just enough to form smooth, tight balls or braids.
- Egg wash twice. Cold dough is denser and takes longer to brown. A double egg wash—once before proofing, once right before baking—creates that deep mahogany finish that looks as good as the crumb tastes.
There's something deeply satisfying about transforming simple ingredients through patience rather than force. The refrigerator becomes a tool as important as your stand mixer or bench scraper. And the results speak for themselves: a brioche with flavor that lingers, crumb that shatters gently under pressure, and a keeping quality that makes leftovers (if there are any) just as good on day three.
If you've been treating brioche as a special-occasion project that demands a cleared schedule, cold fermentation changes the equation. It lets you fit artisan technique into ordinary life. The dough waits for you now. Not the other way around.
For further reading on the science behind slow fermentation, King Arthur Baking's detailed guide on cold fermentation offers excellent technical depth. The Serious Eats Food Lab analysis of no-knead dough fermentation explains the enzymatic processes in accessible terms. And for a deeper dive into the chemistry of flavor development in bread, Cook's Illustrated explores how time transforms taste.