5 key Bread Baking Techniques Every Home Baker Should Master

The Art of Proper Kneading: Developing Gluten Structure
Mastering the Bulk Fermentation and Proofing Process
Perfect Shaping Techniques for Different Bread Types
Scoring Patterns That Control Oven Spring and Appearance
Steam and Temperature Control for the Perfect Crust
Bread baking transforms simple flour and water into something extraordinary. This post breaks down five foundational techniques that separate decent loaves from bakery-quality results. Whether battling dense sandwich bread or chasing that perfect sourdough ear, mastering these skills will change the trajectory of your baking. These aren't trendy shortcuts or Instagram aesthetics — they're the mechanics that professional bakers rely on daily. You'll learn proper kneading methods, fermentation reading, shaping fundamentals, scoring techniques, and steam application for crust development. By the end, your loaves will have better structure, flavor, and visual appeal without expensive equipment or culinary school training.
How Do You Know When Bread Dough Is Properly Kneaded?
Properly kneaded dough passes the windowpane test — stretch a small piece thin enough to see light through without tearing. The gluten network has developed sufficiently when this happens, usually after 8-12 minutes of hand kneading or 5-7 minutes in a stand mixer on medium speed.
Most home bakers stop too early. The dough looks smooth and feels elastic, so they move on. Here's the thing: under-kneaded bread spreads sideways in the oven, yielding a flat, dense crumb with uneven holes. Over-kneaded dough (rare but possible) tears easily and feels tough.
Visual cues matter. Look for these signs:
- Smooth, satiny surface without tearing or cracking
- Dough springs back when poked gently
- Edges pull cleanly away from the mixing bowl
- Feels tacky but doesn't stick excessively to clean, dry hands
The slap-and-fold method — popularized by baker Richard Bertinet — develops gluten aggressively without the monotony of traditional push-and-turn kneading. You slap the dough down, fold it over, rotate, and repeat. Ten minutes of this builds structure fast.
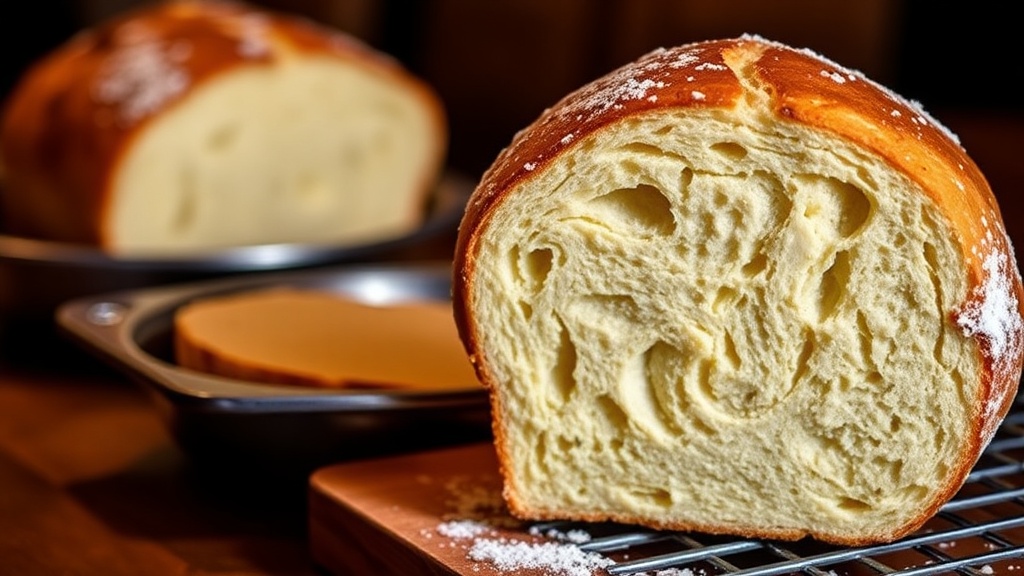
For enriched doughs (brioche, challah, cinnamon rolls), the windowpane test becomes even more critical. Fat and sugar interfere with gluten development, requiring longer kneading times. A King Arthur Baking guide to kneading explains these nuances with excellent photos.
What's the Difference Between Bulk Fermentation and Proofing?
Bulk fermentation happens right after mixing, when the entire dough mass rises before shaping. Proofing (or final fermentation) occurs after shaping, just before baking. These stages serve different purposes, and confusing them ruins bread.
During bulk fermentation, yeast produces carbon dioxide and alcohol. The dough develops flavor complexity — sourdough gets its tang here. Enzymes break down starches into simpler sugars. This stage typically lasts 1-3 hours at room temperature, or overnight in the refrigerator for cold retardation.
The poke test reveals readiness. Press a floured finger into the dough:
| Result | Meaning | Action |
|---|---|---|
| Springs back immediately | Under-fermented | Wait longer |
| Springs back slowly | Perfect | Shape now |
| Stays indented | Over-fermented | Bake anyway (dense result) |
Proofing requires gentler handling. The shaped loaf needs less time — 30-90 minutes typically — because the yeast has multiplied during bulk fermentation. Over-proofed bread collapses in the oven. The catch? Under-proofed bread bursts unevenly or has a tight, gummy crumb.
Temperature matters enormously. Every 17°F (9°C) increase doubles fermentation speed. A kitchen at 75°F behaves completely differently from one at 68°F. Professional bakers use Brod & Taylor foldable proofing boxes to control this variable. A turned-off oven with the light on works acceptably for home kitchens.
Why Does My Bread Collapse or Spread in the Oven?
Improper shaping technique causes most spreading and collapsing issues. Tension on the dough's outer surface creates structure that holds the loaf upright during oven spring. Without this surface tension, even properly fermented dough flattens into a pancake.
The goal is a taut "skin" on top. Here's how:
- Pre-shape the dough into a loose round or log
- Let it rest 20-30 minutes (bench rest) to relax gluten
- Flip it seam-side up on a lightly floured surface
- Fold the sides into the center, creating surface tension
- Roll or stitch the seam closed firmly
- Place seam-down in the banneton or pan
Stitches matter for batards (oval loaves). Pinch the seam multiple times along its length. For boules (round loaves), the envelope fold — bottom up, sides in, then top down — creates excellent tension.
Worth noting: too much flour on the work surface prevents proper sealing. The seam won't stick to itself. Use just enough flour to prevent sticking, scraping the surface clean periodically.
Bannetons (proofing baskets) support the loaf during final proofing. Frieling's rattan bannetons with linen liners work beautifully. Without one, a bowl lined with a floured tea towel substitutes adequately. The ridges imprint an attractive pattern and wick moisture from the surface, helping the crust set properly.
How Do You Score Bread for the Best Oven Spring?
Scoring creates a weak point where steam escapes predictably, directing expansion rather than allowing random tearing. A single deep slash at a 45-degree angle produces the "ear" prized in artisan sourdough — that raised ridge of crust that peels back beautifully.
Angle matters more than most realize. Straight-down cuts open the loaf. Angled cuts create a flap that lifts as the bread expands, revealing the creamy interior crumb against the dark crust. This contrast looks professional and indicates proper fermentation.
Tools make a difference. Razor blades mounted in handles (lames) slice cleanly without dragging. The Zatoba curved lame offers excellent control. Straight razors work in a pinch, though they're trickier to handle. Dull knives tear gluten strands, sealing the cut and defeating the purpose.
Pattern options by bread type:
- Baguettes: Overlapping slashes at 15-degree angles, each covering one-third of the previous
- Boules: Simple cross, square pattern, or single dramatic slash
- Batards: One bold slash or three parallel cuts
- Enriched breads: Decorative snips with scissors for rolls, or straight cuts for loaves
Depth varies by dough. Wet sourdoughs need 1/4 to 1/2 inch. Drier sandwich breads need shallower scores. Move decisively — hesitation creates jagged edges. Score immediately before baking when the dough is cold and firm from refrigeration.
How Do You Get a Crackly, Professional Crust at Home?
Steam during the first 10-15 minutes of baking keeps the crust flexible, allowing maximum expansion before it sets. Once oven spring completes, dry heat hardens the crust into that shattering exterior serious bakers chase. Home ovens vent steam automatically, making this tricky.
Several methods work:
Dutch oven: The preheated cast-iron vessel traps moisture escaping from the dough itself. Lodge's 5-quart enameled Dutch oven — available at Canadian Tire locations throughout Montréal — produces results rivaling professional steam-injected ovens. Preheat empty at 450°F for 45 minutes, drop in the dough, cover for 20 minutes, then remove the lid.
Steam pan: Place a cast-iron skillet or baking sheet on the rack below your bread. Add boiling water immediately after loading the loaf. The violent steam generation mimics commercial conditions.
Ice cubes: Toss 6-8 ice cubes into a preheated pan. They vaporize instantly, creating a steam burst. (Wear oven mitts — splatter happens.)
Spraying: Mist the loaf lightly with water before closing the oven door. Less effective but better than nothing.
The combination method — Dutch oven plus a few ice cubes added when loading — produces the most dramatic results. The crust develops that mahogany color and audible crackle when cooling (the "song" of good bread).
Cooling matters too. Bread continues cooking internally after leaving the oven. Cutting too soon — before the internal temperature drops below 120°F — yields gummy slices. Wait at least one hour for sandwich loaves, two hours for hearty country breads. Set the loaf on a wire rack, not a cutting board that traps moisture underneath.
That said, technique without practice means little. Bake weekly. Keep notes on fermentation times, temperatures, and results. The dough teaches you — if you're paying attention.